Bosses in Arcane Lineage offer a thrilling spectrum of challenges, ranging from those easily tackled by beginners to formidable foes that require multiple teams to conquer. Each boss presents unique mechanics that demand strategic planning and patience to overcome effectively. Defeating these bosses rewards players with some of the game's most coveted loot and items. Dive into our comprehensive Arcane Lineage Boss guide to gear up for the ultimate showdown.
Arcane Lineage Boss List
King Slime
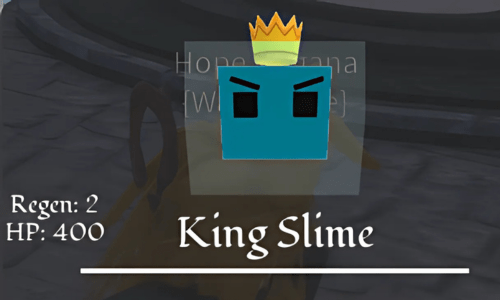
King Slime is considered a mini-boss due to its relatively lower threat level compared to other bosses in Arcane Lineage. However, it remains a formidable challenge for low-level players and does not yield soul points.
King Slime Location
King Slime spawns after 100 Slimes are defeated on the server. It appears around the city nearest to where the last Slime was killed, and a notification on the Quest Board alerts players to the active King Slime quest. The quest involves two steps: finding and then defeating the King Slime. There's a 30-minute global cooldown on the server for this quest.
King Slime Fighting Strategy
With 400 HP (600 if Corrupted), King Slime is the least durable boss in Arcane Lineage. Its main tactic involves summoning additional Slimes, which can overwhelm your party if not managed properly. Additionally, it employs AOE poison attacks, making it crucial to come equipped with potions and cleansing abilities. Focus on clearing the summoned Slimes before targeting King Slime directly, as its poison attacks only inflict status effects without direct damage.
| Attacks | Energy Cost | Effect |
|---|---|---|
| **Slime Creation** | 1 | Summons a Slime to fight for **King Slime**. |
| **Crush** | 0 | **King Slime** lunges forward, attacking a party member. |
| **Poison Eruption** | 2 | **King Slime** throws out a burst of Acid, poisoning your party. This attack cannot be dodged or blocked. |
| **Scalding Spray** | 3 | **King Slime** erupts with boiling hot liquid, poisoning your party. This attack cannot be dodged. |
King Slime Drops and Rewards
Defeating King Slime offers the following potential drops:
- Random Tier 1 Equipment
- Slime Buckler
- Gelat Ring
Completing the King Slime event from the Quest Board yields these rewards:
- Ferrus Skin Potion
- Small Health Potion
- Essence
- Gold
Yar’thul, the Blazing Dragon
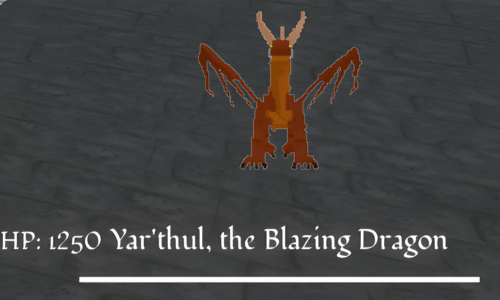
Yar’thul is a fire-type boss that unleashes Fire and Inferno-based attacks, inflicting Inferno and Burning stacks on the party. It's resistant to fire and physical damage but vulnerable to Hex damage.
Yar’thul Location
To encounter Yar’thul, venture deep into the Desert to find Mount Thul, an active volcano formed by Yar’thul’s intense heat. Navigate the dark corridors within Mount Thul to confront the Blazing Dragon at its heart.
Yar’thul Fighting Strategy
Boasting 1200 HP (1800 if Corrupted), Yar’thul compensates for its lower health with devastating damage output. Most of its attacks apply Inferno and Burning effects, making this a race against time to defeat the dragon before succumbing to the flames. When its health drops below 50%, Yar’thul enters a second phase, summoning meteors that stun and reduce healing. Quick action is required to end the fight before the meteors take their toll. Accessories like the Dragon Ring and at least Pristine-level gear can ease this battle. The Corrupted version gains lifesteal.
| Attacks | Energy Cost | Effect |
|---|---|---|
| **Inferno** | 0 | Automatically inflicts the party with the **Inferno** status effect at the battle's start. Cannot be dodged or blocked. |
| **Fire Claw** | 0 | **Yar’thul** slashes with fire-imbued claws, dealing light damage. |
| **Magma Pillar** | 2 | **Yar’thul** creates a pillar of magma, damaging and inflicting 2 stacks of **Inferno** and 5 stacks of **Burn** to those who attack through it. Lasts 3 turns. |
| **Blaze Core** | 3 | **Yar’thul** heals based on the **Inferno** stacks consumed from the party. |
| **Blaze Eruption** | 2 | **Yar’thul** slams the ground, damaging burning targets and applying scaling **Inferno** and **Burning** stacks. |
| **Magma Beam** | 4 | **Yar’thul** charges a devastating fire beam for 1 turn, then fires it for massive damage, affecting adjacent units. Cannot be dodged or blocked. |
| **Hellfire** | 1 | **Yar’thul** sends an unstoppable wave of fire, lightly damaging the whole party and applying 9 stacks of **Burning**. Cannot be dodged or blocked. |
| **Armageddon** | 6 | Below 50% health, **Yar’thul** may summon a meteor, dealing massive damage and applying healing reduction. Can stun and be used multiple times. Cannot be dodged or blocked. |
Yar’thul Drops and Rewards
Defeating Yar’thul guarantees these rewards:
- Absolute Radiance
- Permafrost Curse
- Wild Impulse
- Heavenly Prayer
- Breath of Fungyir
- Narhana’s Sigil
- Reality Watch
- Shifting Hourglass
- Ring of the Dragon
- The Void Key (if Corrupted Yar’thul)
Possible drops include:
- Dragontooth Blade
- Dragonbone Gauntlets
- Dragonbone Spear
- Dragonflame Shield
- Memory Fragment
- Soul Dust
- Phoenix Tear
- Resplendant Essence
- Lineage Shard
- Skyward Totem
Thorian, the Rotten
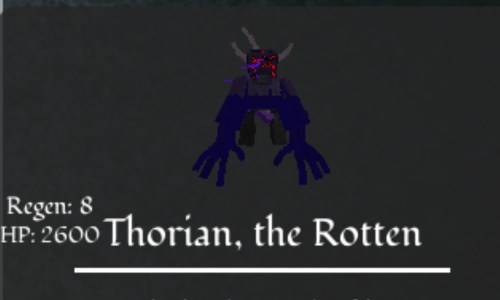
Originally an animal in the Deeproot Canopy, Thorian has become a towering abomination with numerous red eyes and tentacles, cursing all who approach. It's resistant to most elements but significantly vulnerable to Holy damage.
Thorian Location
Thorian lurks in the deepest reaches of the Cess Grounds within the Deeproot Canopy. Upon entering the Cess Grounds, head right to encounter this massive, unmistakable foe.
Thorian Fighting Strategy
With 2600 HP (3900 if Corrupted), Thorian presents a complex battle with unique mechanics. It heals 150% of damage dealt if hit twice in a row with the same attack type, requiring a diverse attack strategy. Thorian is resistant to all damage except Holy, which deals 135% damage, and slightly vulnerable to fire. Below 50% health, it unleashes a devastating attack, inflicting Plague, Curse, and Hexed with a 15-turn cooldown.
| Attacks | Energy Cost | Effect |
|---|---|---|
| **Cursed Wave** | 2 | **Thorian** attacks 3 party members, with a chance to inflict **Curse**. |
| **Overflowing Curse** | 0 | Starts a minigame; failure results in **Plague**. Cannot be dodged or blocked. |
| **Cess Breath** | 1 | **Thorian** releases rotten air, dealing **AOE** damage and debuffing the party. |
| **Warped Crush** | 1 | **Thorian** charges, damaging 3 party members. |
| **Blasphemous Obliteration** | 5 | Below 50% health, **Thorian** devastates the party, applying 1 **Plague**, 3 **Curse**, and 1 **Hexed** stacks. Cannot be dodged or blocked. |
| **Hexed Burst** | 1 | **Thorian** sends a small **AOE** wave, damaging the party with a chance to apply 1 **Hexed** or 3 **Curse** stacks. |
| **Plague Rupture** | 2 | **Thorian** gives a party member a random debuff, then ruptures them for massive damage scaling with debuff count. |
Thorian Drops and Rewards
Defeating Thorian guarantees these rewards:
- Absolute Radiance
- Permafrost Curse
- Wild Impulse
- Heavenly Prayer
- Breath of Fungyir
- Stellian Core
- Metrom’s Amulet
- Darksigil
- Ring of Blight
- The Void Key (if Corrupted Thorian)
Possible drops include:
- Blightrock Dagger
- Blightwood Staff
- Memory Fragment
- Soul Dust
- Phoenix Tear
- Resplendant Essence
- Lineage Shard
- Skyward Totem
Metrom’s Vessel
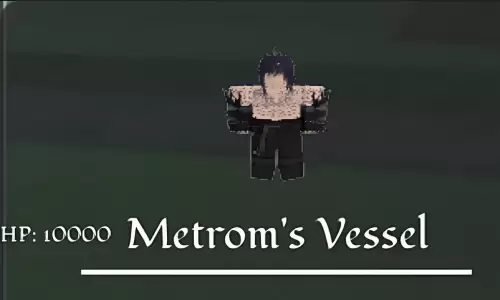
Once a heroic figure, Metrom’s Vessel now serves as a host for Metrom, sealed in a Temporal Jail to curb its destructive power.
Metrom’s Vessel Location
Metrom’s Vessel is a Raid Boss that spawns on a global timer. To engage in this battle, you'll need a Void Key, obtained by defeating corrupted versions of other bosses. Await the server-wide announcement for Metrom’s Vessel's spawn and location.
Metrom’s Vessel Fighting Strategy
With an immense 10,000 HP (15,000 if Corrupted), Metrom’s Vessel is a formidable statpile. It features two phases with distinct moves, mechanics, and high damage output. In the first phase, its black wings grant significant damage negation; destroying these wings requires applying status effects and debuffs, but increases its damage output as fewer wings remain. Timing wing destruction is crucial to avoid early access to second-phase attacks. Metrom’s Vessel also summons Shadeblades, which deal high damage despite their low health. Prolonged fights increase the risk of Oblivion, an undodgeable move that deals 50% max HP damage.
In the second phase, Metrom’s Vessel shatters the Temporal Jail, altering the wing mechanic to include Offensive and Defensive modes. The Offensive mode boosts its damage and that of its minions, while Defensive mode offers high damage resistance and a Thorns Aura. The Mini Shadebringer is an additional threat, attacking whenever a player fails to dodge. Effective team coordination and constant application of debuffs and damage-reducing effects are essential to overcome this endurance test.
Phase 1 Attacks
| Attacks | Energy Cost | Effect |
|---|---|---|
| **Rendering Slash** | 0 | **Metrom’s Vessel** lunges, damaging and applying 3 **Weakness** stacks. |
| **Deathbound** | 1 | Chooses 2 random players to apply 3 **Sundered** stacks. |
| **Eclipse** | 1 | Applies a self-buff. |
| **Invoke Shadeblades** | 3 | Summons two **Shadeblades** with 200 HP each. Cannot be dodged or blocked. |
| **Hexed Rend** | 3 | An undodgeable **AOE** slash that debuffs all players. |
| **Oblivion** | 5 | Deals 50% of everyone’s HP and inflicts **Curse**. Cannot be dodged or blocked. |
Phase 2 Attacks
| Attacks | Energy Cost | Effect |
|---|---|---|
| **Oblivion + Eclipse** | 1 | Combines **Rendering Slash** (P1) and **Hexed Rend** (P1). |
| **Unyielding Fury** | 2 | Applies 3 **Blind** and 2 **Hexed** stacks to all players. Cannot be dodged or blocked. |
| **Minishade Bringer** | 3 | Shoots 3 **Shadebringers**. Cannot be dodged or blocked. |
| **Shadebringer** | 1 | Slashes 3 **Shadebringers**, hitting the whole party and applying 4 **Cursed** stacks. Cannot be dodged or blocked. |
| **Blackout** | 2 | Debuffs the whole party. Cannot be dodged or blocked. |
Metrom’s Vessel Drops and Rewards
Defeating Metrom’s Vessel guarantees these rewards:
- Metrom’s Grasp
- Chaos Orb
- Expedite Anklet
- Echo Shard
- Tempurus Gem
- Arcanium Crystal
Possible drops include:
- Darkblood Staff
- Darkblood Dagger
- Darkblood Spear
- Darkblood Hexer
- Darkblood Sword
- Darkblood Cestus
Arkhaia and Seraphon
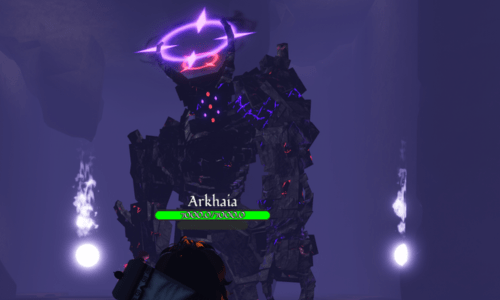
Information on Arkhaia and Seraphon is limited due to their rarity and complexity. These bosses are not recommended for beginners, even with a strong team, as they involve numerous intricate mechanics.
To unlock Arkhaia, reach rank 20 in the Cult of Thanasius. Arkhaia has 7000 HP and employs a damage-over-time strategy. Defeating Arkhaia offers the option to start anew with the Inferion race, a rare and powerful starting race in Arcane Lineage.
To unlock Seraphon, achieve rank 20 in the Church of Raphion. Seraphon has 4500 HP, and defeating it allows the choice to begin a new character as the Sheea race, another powerful and rare starting race in Arcane Lineage.
This concludes our Arcane Lineage Boss guide. For those eager to enhance their power, explore our complete Arcane Lineage Class tier list and guide.


